Thursday, December 18, 2014

Fudge

  
Fudge is one of those treats that seems to be reserved for Christmas parties and cookie trays, which is probably a good thing because it is hard to stop at one tiny piece of this rich, chocolatey treat. Through the years, each of my children have become designated makers of a particular treat, and Mini Me is the fudge maker in our family. Mimi Jr makes seven layer bars, Boy Mimi is always right by my side while divinity is cooking, and Mr. Mimi has happily accepted his role as chief taste tester. 

My family has been making this fudge recipe since the 1950's, and we have learned a few things along the way. First, candy making can be tricky. Although we have success more often than not, we have had a few batches deemed failures. For us, the fudge needs to be smooth and creamy, not grainy, with a  deep chocolate flavor. Second, use a chocolate that you like to eat. We have changed the recipe from Hershey's bars to high quality milk and dark chocolate. Third, be careful when cooking the syrup. Keep a pastry brush in a cup of water near by to clean the side of the pan when sugar crystals form, and do not over cook the syrup. Use a good, accurate thermometer and have a timer handy. Every time I try to guess on time or temperature, something goes wrong and I end up wishing I had set a timer. Most importantly, have an excited taste tester around to lick the spoon when you are done, and plenty of bags for gifting this favorite holiday treat. 
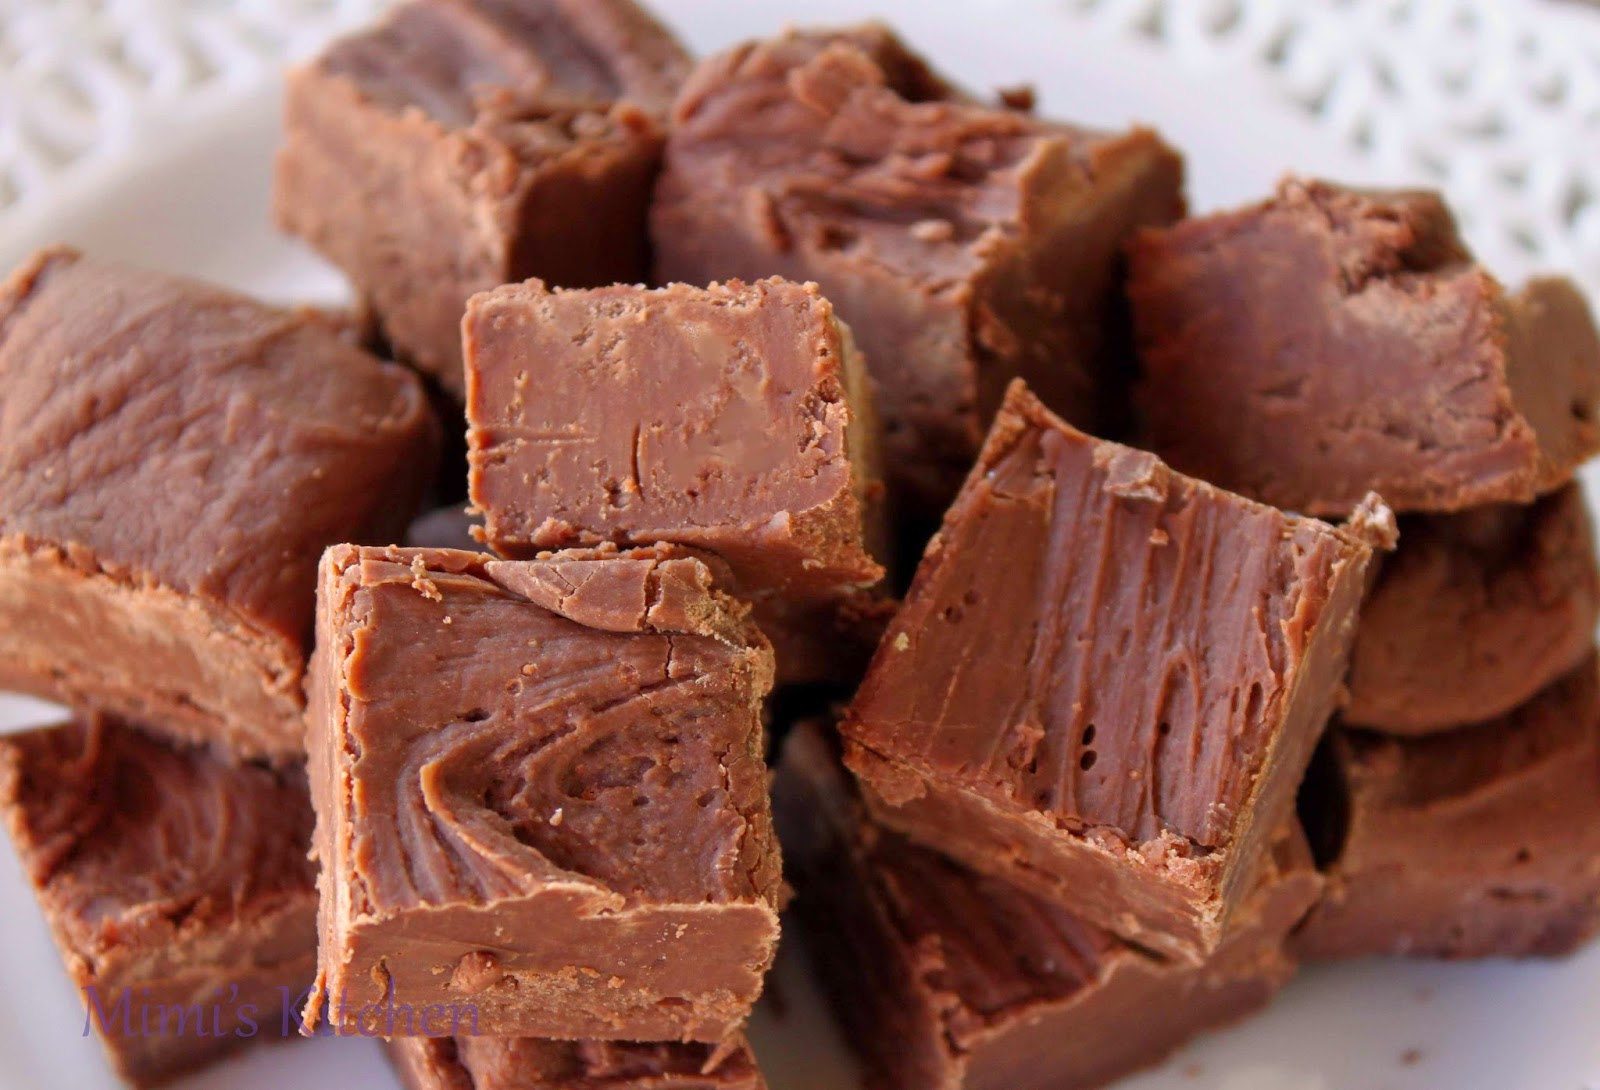

Fudge

1 - 12 oz can evaporated milk
4 1/2 cup granulated sugar
4 oz butter
12 oz dark chocolate,chopped
8 oz milk chocolate,chopped
1- 7 oz  jar marshmallow creme 
1 tsp salt
1 tsp vanilla
Optional: 1-2 cups chopped nuts


Butter a 9x13 pan


In a large bowl combine the chocolate, marshmallow creme, salt and vanilla. Microwave on high for 1-2 minutes to soften the chocolate. Set bowl aside. 


In a deep pot combine butter, milk, and sugar, and cook, stirring, over medium low heat until it comes to a boil. Do not stir in the sugar crystals from the sides of the pan, but use a pastry brush dipped in water to clean away the sugar. Stirring continuously, boil for 5 minutes, or until mixture reaches 234 degrees f. After the first 5 minutes, check the temperature every minute. It does not usually take more than 7 minutes total.


Remove from heat and pour syrup over the chocolate mixture. Stir until the chocolate and marshmallow creme have melted and are completely incorporated, add nuts if using. Pour into prepared pan. Smooth the surface then score fudge in desired size pieces. Let cool completely before cutting.
printable recipe


link:Foodie Friday

Sunday, November 16, 2014

Pumpkin Streusel Coffee Cake

One of my favorite things about the holiday season is all the kitchen traditions we have made over the years. We always have Indian Pudding on Thanksgiving, Mrs. A's meatballs on Christmas Eve, and days upon days of cookie baking and decorating. We've been making this pumpkin coffee cake for many years, and it is the perfect thing to have around for breakfast with a cup of coffee, or as an afternoon snack while decorating our mountains of cookies. 


The basic recipe comes from the Moosewood Restaurant Book of Desserts and  we have added a few twists to make it our own. The cake is moist and soft, and full of the fall spices that make everything so fragrant and delicious. While we find it pretty much perfect as is, this simple cake is easily adaptable; throw in a handful of chocolate chips or dried cranberries to start your own kitchen tradition.


Pumpkin Streusel Coffee Cake
adapted from Moosewood Restaurant Book of Desserts
 
1 cup butter
2 cups brown sugar
2 eggs
2 teaspoon vanilla
1 1/2 cup pumpkin puree
2 cups flour
2 teaspoons baking powder
2 teaspoons
1 teaspoon salt
1/2 teaspoon ground ginger
1/2 teaspoon ground cloves
1/2 teaspoon allspice
1 cup chopped toasted walnuts or pecans


Topping
3/4 cup butter
1 cup brown sugar
1 1/2 cups flour
1/2 teaspoon cinnamon
Pinch of salt
1/2 cup chopped toasted walnuts or pecans

Icing:
1 1/2 cups powder sugar
1 teaspoon vanilla
pinch salt
2-3 tablespoons milk

Pre heat the oven to 350 degrees F. Spray a 9x13 baking pan with cooking spray.

Make streusel topping:

In a medium bowl, with your fingers blend the first 5 ingredients together, making a moist crumble. Add the nuts and mix to combine. Set aside.

In the bowl of your mixer cream together the butter and sugar, until light and fluffy, about 3 minutes.  Add the eggs, one at a time. Add the vanilla and pumpkin puree and continue to beat until thoroughly mixed.  Stir together the flour, baking powder, cinnamon, salt, ginger, cloves and allspice. Add to the pumpkin mixture and mix until combined then fold in the nuts. Pour batter in prepared pan, smooth top and sprinkle streusel topping evenly over the top
.
Bake in for 40 -50 minutes, until a knife inserted in the center comes out clean. Cool.

When cake has cooled mix together icing ingredients in a small bowl, adding enough milk so that icing drizzles from your spoon. Drizzle the icing over the cooled cake. (I put the icing in a sandwich bag, snip off the corner and drizzle away)
Printable recipe
 
Enjoy!
  
Link:Foodie Friday

Tuesday, September 30, 2014

Fun Fall Treats

No matter how old my children get, they never get tired of holiday treats. I still make them hand made Valentines, Shamrock cookies, and Easter baskets, and Halloween is another favorite holiday for festive treats. Here are a couple of fun ideas that travel well, so they are perfect for sending to kids who are off at college, or a friend who you know would love a little holiday spirit. Both of these are coated in candy melts which help to seal them and keep them fresh during their travels.
These mice cakes are also a chance to use the egg cake mold that I only use at Easter. They are easy and cute and my kids have loved these since they were little, Make your favorite cupcakes and bake them in the egg mold pan. I like to chill the fully baked cakes in the refrigerator for an hour or so to help firm them up before dipping in grey candy melts. I use 80 % white to 20 % black candy melts to make gray. Once they are dipped, use sliced almonds for the ears, mini chocolate chip for the nose, and licorice whips for the tail, with red non perils for the eyes. when dry use a food writer to draw on the whiskers, and you have yourself the only mouse you ever want to see in your kitchen.


We all love anything involving peanut butter, so when I saw these a few years ago I knew they would make the perfect addition to a Halloween care package to send to Mini Me. The pumpkins are Ritz crackers with peanut butter sandwiched in between and dipped in orange candy melts. Once they dry, draw on the face details with a food writer or  black candy melts.
In addition to these, I usually tuck in some caramel corn, granola and spiced nuts for a great package of homemade treats that gets everyone ready for fall!
Link foodie Friday

Friday, August 29, 2014

Rocky Road Brownies


Good, old fashioned brownies are hard to beat, but if there was dessert to challenge them, these Rocky Road brownies would be it. They start with a rich brownie base, and take it up a notch by adding chocolate, nuts, and marshmallows. A little cream cheese is added to keep these soft and almost creamy, and to balance the sweetness from all the chocolate and marshmallows. These have made many summer BBQ appearances, and just might grace our dessert table over this long weekend.

This recipe comes from the  Only In California (1989), a cookbook published to raise funds for the Children's Home Society of California. I have several small cookbooks from various clubs and societies around the world, and I have found some of my favorite recipes in them. Many of these include recipes submitted from home cooks, and there is something fun about recreating a dish that you know another family loved enough to share in a book. I hope you enjoy these brownies as much as we do!

Rocky Road Brownies
Via Only in California

Bar:
1/2 cup butter
1 square unsweetened chocolate
1 cup sugar
1cup flour
1/2 cup chopped nuts
1 tsp baking powder
1 teaspoon vanilla
2 eggs

 Filling:
6 ounces cream cheese
1/2 cup sugar
2 tablespoons flour
1 egg
1/4 cup butter
1 teaspoon vanilla
1/4 cup chopped nuts ( I use peanuts, but any nut is fine)
6 ounces chocolate chips

 Frosting:
3 cups miniature marshmallows
1/4 cup room temperature butter
1 square unsweetened chocolate
2 ounces.cream cheese
1/4 cup milk
1 pound sifted powdered sugar
Spray with baking spray, or grease and flour a 9x13 pan. Pre heat the oven to 350 degrees F.

1. Make the bar: melt butter and chocolate over low heat or in the microwave. Add remaining bar ingredients and mix well. Spread in prepared baking pan.

2. Filling: Beat cream cheese, butter and sugar until smooth. Add egg, and vanilla mixing well. Add flour, beat until fluffy. Stir in the nuts. Spread over the bar mixture and sprinkle with chocolate chips. Bake at 350 degrees F. For 25 minutes

3. Frosting : Melt butter, chocolate, cream cheese and milk. Stir until smooth. Beat in sifted powdered sugar continue beating until smooth and satiny. Set aside until brownies come out of the oven.

 4. When brownies are done, remove pan from oven, sprinkle the marshmallows on top and return the pan to the oven and bake 2 minutes longer, until marshmallows are puffed. Remove from oven and immediately pour frosting over marshmallows and swirl together with a knife. Cool before cutting.

Printable recipe


Link:Foodie Friday

Saturday, July 26, 2014

Sugar Cookies


We have had a lot of celebrations this spring and summer, and we use every one as an excuse to make decorated sugar cookies. All we need is a theme or some color ideas, and we get baking!

 Our extended family welcomed two new baby girls this year. My sister is very lucky to have two new granddaughters! Baby H was born in May, and then Baby E followed in early June. They are both beautiful little girls already, and I see a future full of dress up and tea parties. 


For both showers, we did a tray of onsies and bibs, in pink for girls, and some cookies with the initial of each baby name in colors that coordinated with the baby rooms. Both moms gave us ribbon samples or pictures of bedding and we used those colors as our guide. 
 Mimi Jr. recently said adios to a co-worker, who happens to love all things western. We took this as an opportunity to try some new cookies. We have never made boots or bandannas, but they were fun to do, and now we are ready for any Western themed parties that comes our way. 
for a tutorials on the bandanas   and marigolds
visit The Sweet Advemtures of Sugar Belle 


  We took on the task of cookie baking for a few spring parties hosted by friends, and nothing says springtime like some pretty blooms. It was fun to try new techniques for decorating, and we liked that these are an easy way to add some festivity to the table. 

Zinnias (top)I used a petal tip, with fairly firm icing holding the tip  perpendicular to the cookies surface  Marigolds (bottom)
I followed the tutorial at  sweetsugarbelle 

After four years that simultaneously dragged on and flew by, Mini Me graduated from UCI.

with her BSN.

She worked so hard and I know she will make an amazing nurse. The Mimi's are all very proud of her, and we will continue to supply her with cookies wherever she ends up.
 In just the first half of this year, we have had so much fun making and decorating cookies for friends and family.  I know there are many more occasions in the coming months that will be calling for cookies, and we will gladly get out our rolling pins and piping bags and bake away!

Sugar Cookie Recipe


Link: Foodie Friday

Tuesday, June 10, 2014

Oatmeal Raisin Cookies


  While everyone in our family would give you a different answer if asked to name their favorite dessert, no one can pass up a good cookie. We have been on a cookie baking streak lately, and in addition to some old favorites I recently tried these oatmeal raisin ones from Thomas Keller's Bouchon Bakery cookbook. Previously, oatmeal raisin cookies were in the second choice, "does not contain chocolate" category, but this recipe has most definitely changed our minds.

 They are big and buttery, crispy on the edges and chewy in the center. The spices are subtle and warm, while the raisins are soft and sweet. It's true that there is no chocolate, but we love these cookies just as they are. I have already made them several times at the request of my chocolate loving family, and that's a sure sign that these are delicious and deserve their turn in the cookie spotlight. 


Oatmeal Raisin Cookies
 Thomas  Keller

144 grams   (1 cup 1 teaspoon ) all purpose flour
7.7 grams  (1 tablespoon)  ground cinnamon 
7.4 grams  (1 1/2 teaspoons ) baking soda
3.6 grams (1 1/4 teaspoons) kosher salt
140 grams (1/2 cup + 3 1/2 tablespoons) light brown sugar
69 grams (1/4 cup +1 1/2 tablespoon) granulated sugar
155 grams (5.5 ounces) unseated butter room temperature
62 grams eggs (1 large)
7.7 grams vanilla bean paste or 1 teaspoon vanilla
155 grams (2cups) old fashion oats
156 grams (1cup) mixed raisins* we used craisins

1. Place flour,salt,baking soda and cinnamon in a bowl and whisk to combine.
2. Place butter in the bowl of a stand mixer fitted with the paddle attachment . Beat the butter on medium low until it is the consistency of mayonnaise . Add the sugars and mix for 3-4 minutes, until fluffy. Scrape the side and bottom of the bowl.  Add the egg and vanilla and mix on low for 15-30 seconds.do not over whip.
3. Add the dry ingredients in two additions, mixing on low speed for 15-30 seconds after each addition. Scrape the sides and bottom of the bowl to make sure the flour is completely incorporated. Add the oats and mix for a minute or two. Quickly fold in the raisins. Refrigerate the dough for 30 minutes.
Baking: heat oven to 325 degrees F. Line baking sheet with parchment or use silpats . Using a large scoop place the cookies about 2 inches apart on prepared baking sheet . Bake for 15 minutes turning pans 1/2 through baking. Cool on the pan for 5-10 minutes than transfer to a rack to cool completely.
printable recipe


Link:Foodie Friday

Monday, May 12, 2014

Nilla Wafers

We all have favorite treats from our childhood, and as much fun as it is to buy a nostalgic treat at the store from time to time, it is even more fun to make them. Mr. Mimi has a great love for the classics, and Nilla Wafers are high on his list, so when I saw a recipe to make them at home I jumped at the chance to recreate one of his favorite after school snacks from his elementary school days.

While these cookies look a little different than the ones from the yellow box, the rich vanilla flavor combined with the crisp, but not too hard cookie, definitely hits all the same notes. I had plans to make cookie sandwiches and dunk some in chocolate, but before I could even make a batch of ganache, these cookies were gone. According to some of my family, the classics are best left alone. Lucky for me, these cookies are pretty easy to make, and I can have a double batch ready to go in no time- half for the purists, and half for the adventurers


Vanilla Wafers

Recipe courtesy Alton Brown, 2010
makes about 6 dozen

Ingredients


7 ounces all-purpose flour

3/4 teaspoon aluminum free baking powder

1/2 teaspoon kosher salt

4 ounces unsalted butter, room temperature

3 1/2 ounces vanilla sugar

1 large egg

4 teaspoons vanilla extract

1 tablespoon whole milk


Directions

Position 1 oven rack in the top third of the oven and another in the bottom third. Heat the oven to 350 degrees F.


Sift together the flour, baking powder, and salt in a small bowl and set aside. Cream the butter and vanilla sugar in the bowl of a stand mixer on medium speed for 2 minutes, stopping to scrape down the sides of the bowl after 1 minute. Add the egg and incorporate on medium speed for 30 seconds. Scrape down the sides of the mixer bowl. Add the vanilla extract and milk and blend on low speed for 15 seconds. Add the flour mixture and mix on low speed just to incorporate. Chill the batter in the refrigerator for at least 10 minutes before scooping.


Scoop the batter in teaspoon-sized balls and arrange them on 2 parchment paper-lined half sheet pans, approximately 35 cookies per pan. Use the heel of your hand to slightly flatten each ball. Bake, 2 pans at a time, rotating the pans halfway through the baking, until golden brown, about 15 to 20 minutes. Remove the pans to a cooling rack to cool completely before removing the cookies from the pan.


Foodie Friday

Monday, April 7, 2014

Peanut Butter Cranberry Energy Bars


When Mini Me started college, she found her schedule packed with long days on the go with little time for a substantial breakfast or lunch. I wanted to make her a portable snack that would give her energy and brain power throughout the day, but without crazy ingredients or the protein powder after taste. Mini Me loves peanut butter which is a good source of protein and healthy fats, so that was a good starting point in searching for a recipe to try. During my search for a portable snack bar I came across this Sunset Magazine article on homemade energy bars and decided to give them a shot.
I have been making these bars for the last 4 years while she has been in school, and I know I will make them long after she graduates. They are moist and soft, and packed with good for you ingredients. These bars are quick to make and travel well. With approximately 210 calories, 24 grams of carbohydrates and 7 grams of protein in each bar, these make a perfect grab and go item on your way out the door at the beginning of a busy day. I wrap the bars individually in plastic wrap, put them in a gallon sized ziplock bag and send them to Mini Me every few weeks. She keeps them in the freezer and tosses one in her backpack as she heads to class and I'm happy knowing she has a tasty, healthy snack in her bag just in case she doesn't have time to stop and eat during the day. 


Peanut Butter Cranberry Energy Bars
adapted from Sunset Magazine

1 cup rolled oats
1/3 cup oat or wheat bran
3 Tbs ground flax seeds
1 cup whole wheat flour
1/2 tsp each baking powder and salt
1/2 cup each chopped peanuts, dried cranberries, and finely chopped dates
3/4 cup peanut butter
1/4 cup low fat milk
1 large egg
1/2 cup honey
Zest from one orange
1 Tbs fresh orange juice.

Line a 9x13 pan with plastic wrap. In a large bowl, stir together oats, bran, flax, flour, baking powder, salt, peanuts, cranberries and dates.

In the bowl of a stand mixer, beat together peanut butter, milk, egg, honey, orange zest and orange juice until well blended.

Add flour mixture and beat until completely blended. Scrape dough into prepared pan and with wet fingers or a rubber spatula, pat to fill pan completely and evenly. Chill dough until firm, about 30 minutes.

Heat oven to 300 F. Invert pan onto a work surface, lift off pan, and peel away plastic wrap. Using a bench scraper or knife cut straight in half length wise. Then cut each length into 8 bar about 1 1/2 inches wide. Place bars about 1 inch apart on a baking sheet lined with a slip at or parchment paper. Bake bars until lightly browned and somewhat firm to touch, about 20 minutes. Remove from oven and let cool completely.
printable recipe

 
Foodie Friday