Saturday, December 7, 2013

Gingerbread Snowflakes


I can never resist when I see a pretty cookie idea, and these popped up just in time to be made as favors at a holiday dinner with a group of long time friends. In their December issue Sunset Magazine featured gingerbread snowflakes, and that first lovely picture was all the prompting I needed to get the mixer out. While I used the design from Sunset, we opted to try the Cooks Illustrated gingerbread cookie recipe from their 2011 holiday baking issue. This one recipe lets you make thick and chewy cookie or thin and crispy ginger snap cookie from the same dough, all you have to change is the thickness of the rolled dough and the baking time and temperature. As usual with a Cook's recipe, we were not disappointed. Our only challenge was trying to decide if we liked the soft thick cookies or the thin crispy ones best.

Thick or thin, these cookies had great ginger flavor and were really easy to make. Using a food processor for the dough made it a quick one bowl recipe, and the dough was pretty easy to work with. Although in our regular sugar cookie decorating we use royal icing, the chocolate glaze on these cookies goes really well with the ginger and spice, making for a delicious and slightly different take on the usual holiday cookies that come from our kitchen. 

Thick and Chewy Gingerbread Cookies
adapted: Cooks Illustrated Holiday Baking 2011

3 cups all purpose flour
3/4 cups packed brown sugar
3/4 teaspoon baking soda
1/2 teaspoon salt
1 tablespoon ground cinnamon
1 tablespoon ground ginger
1/2 teaspoon cloves
12 tablespoons unsalted butter, cut into 12 pieces softened slightly
3/4 cup molasses
2 tablespoons milk.

1. In food processor, process flour, sugar, baking soda, cinnamon, ginger and cloves together until combines. Scatter butter pieces over the flour and process until mixture is sandy, about 15 seconds. With machine running, gradually add molasses and milk, process until dough is evenly moistened and forms a soft mass. (You could use a stand mixer instead of a food processor)

2. Scrape dough onto counter; divide in half. Working with 1 portion at a time roll to an even 1/4 inch thickness between 2 sheet of parchment paper. Leave dough between parchment paper and stack on baking sheet and freeze until firm, 15-20 minutes. Or refrigerate dough 2 hours or overnight.

3. Adjust oven rack to upper middle and lower middle positions. Heat oven to 350f. Line 2 baking sheets with parchment paper or silpats.

4. Remove one sheet of dough from freezer place on counter and peel off the top sheet of parchment. Flip the dough over and peel off the second sheet. Cut the dough into desired shapes and transfer to prepared baking sheets, spacing them 1 inch apart. Set scraps aside. Repeat with remaining dough until cookies sheets are full. Bake cookies until centers are just set and dough barely creates an imprint when touched very gently with fingertip, 8-11 minutes, rotating sheet front to back, top to bottom halfway through baking. Do not over bake. Cool cookies in sheets for 2 minutes, then transfer to wire rack to cool completely.

5. Gather scraps together; repeat rolling, cutting and baking until all dough is used. We chilled our dough after re-rolling each time. 

* For thin crispy cookies roll dough 1/8 inch thick and bake at 325 for 15-20 minutes, until center is firm when pressed with finger*

Glaze, Outline and Decoration
Sunset Magazine December 2013
8 ounces bittersweet chocolate, chopped
10 tablespoons unsalted butter
1 tablespoon white corn syrup

For Glaze:
Put chocolate and butter in a large glass bowl. Melt in a microwave in 20-30 second intervals, stirring between each until mixture is smooth. Stir in the corn syrup. Let cool until it's body temperature and drizzles in a thick ribbon. (if it solidifies, microwave about 10 seconds and stir to liquefy).

For outline: Melt 4 ounces bittersweet chocolate until completely smooth. Pour into small parchment cone or zip lock bag with a tiny corner cut off.

Decoration: Melt 2 ounces white chocolate until smooth. Pour into small parchment cone or zip lock bag with a tiny corner cut off.

Parchment cones or zip bags are necessary, when the chocolate cools and becomes to hard to pipe, just zap it in the microwave for a few seconds until it is soft enough to use again.

Working with one cookie at a time, with the bittersweet chocolate pipe a boarder around your cookie. Using the glaze(I used a regular piping bag with a #4 tip) flood the center of your cookie. Shake or jiggle your cookie until the glaze is smooth. With the white chocolate, pipe a zig zag down the length of one arm of the snowflake quickly drag the tip of a  knife or a tooth pick through the zig zag, to the center of the cookie. Repeat zig zagging and dragging each arm of your snowflake. Try to work fairly fast; as the chocolate cools and sets it becomes more difficult to drag a smooth line without creating a lumpy mess in the dark chocolate. 
printable recipe


Sunset magazine has a video of the process and directions for making a parchment cone if you need it.


link:Foodie Friday

Wednesday, November 13, 2013

Hermits


In our house, food has seasons. Not just what's available at the store kind of season, but for us it's also the foods we associate with summer, and with fall. We usually don't eat strawberry short cake in December, nor do we eat pumpkin pie in July. (However, ice cream is fair game all year!)

These hermit cookies are new to my children, but something I remember well from the colder months of my own childhood. They are a soft and chewy raisin spice cookie with a sweet citrus glaze, and my mom would have a tin of them at the ready during the fall and winter seasons, for that afternoon cup of tea or to share with some unexpected holiday guests. Now that I have made them for my family, they will definitely be on the list of seasonal favorites that we look forward to every year. 


Hermits
from Cook's Holiday Baking 2013

1 cup raisins
2 tablespoons finely chopped crystallized ginger
8 tablespoon unsalted butter
1 teaspoon ground cinnamon
1/4 teaspoon allspice
2 cups all purpose flour
1/2 teaspoon baking soda
1/2 teaspoon salt
3/4 cup packed dark brown sugar
1/2 cup molasses
2 large eggs
1 1/2 tablespoons orange juice
3/4 cup confectioners sugar

Process raisins and ginger in food processor until mixture sticks together and only small pieces remain, about 10 seconds. Transfer mixture to large bowl.

Heat butter in a small saucepan over medium low heat, swirling pan occasionally, until nutty brown in color, about 10 minutes. Stir in cinnamon and allspice and cook until fragrant, about 15 seconds. Stir butter mixture in to raisin mixture until well combined; let cool to room temperature.

Combine flour, baking soda, and salt in bowl. Stir brown sugar, molasses and eggs into cooled butter raisin mixture until incorporated. Fold in flour mixture (dough will be sticky) and refrigerate, covered, until firm, at least 1 1/2 hours or up to 24 hours.

When ready to bake pre heat oven to 350 degrees and line 2 baking sheets with parchment paper or silpat

Divide dough into quarters. Transfer 1 piece of dough to lightly floured surface, roll into 10 inch log. Transfer to prepared baking sheet and use a ruler to neatly square off sides. (each sheet will contain 2 logs) Repeat with remaining dough. Bake until only shallow indentation remains on edges when touched (center will appear slightly soft), 15 to 20 minutes, switching and rotating baking sheets halfway through baking. Let cool on baking sheet for 5 minutes, then transfer to wire rack and let cool completely.

Whisk orange juice and confectioner's sugar in small bowl until smooth. Drizzle glaze onto cooled logs and let sit until glaze hardens, about 15 minutes. Cut logs into 2 inch bars. Cookies can be stored in airtight container room temperature for up to 5 days.
printable recipe


Links: Foodie Friday

Tuesday, October 29, 2013

Pumpkin Whoopies Pies

In our house we love the flavors of fall, from pumpkin breads and muffins,apple tarts, to cranberry,and our favorite pear pie. While we are lucky enough to have our summer weather last well into September, it does make our fall season seem a little short. It feels like just a quick month before we are already into our Christmas cookies and peppermint treats. We try our best to get in plenty of fall baking, and these pumpkin whoopie pies are a great way to celebrate the cooler days and changing leaves. 
These cake sandwich cookies really deliver on the fall flavors. They are full of pumpkin and warm spices, and the sweet and tangy cream cheese filling makes these almost like an inside out cupcake, that is portable and easy to eat. 

The recipe for these came from the Baked Cookbook, and the guys behind the famous bakery explain that cold pumpkin is key to making these whoopie pies. It makes your whoopies easier to scoop and gives them a domed top, so be sure to plan ahead for these. The cookies and filling can both be made ahead and stored separately for a day or two, and will also last a few days assembled in the refrigerator.  I made 1/2 the recipe and using my tablespoon scoop I got 18 whoopies (36 cookies)

Pumpkin Whoopie Pies
Baked New Frontiers in Baking by Matt Lewis and Renato Poliafito

Whoopies pies
3 cups all purpose flour
1 teaspoon salt
1 teaspoon baking powder
1 teaspoon baking soda
2 tablespoons cinnamon
1 tablespoon ginger
1 tablespoon cloves
2 cups dark brown sugar
1 cup vegetable oil
3 cups chilled pumpkin purée
2 large eggs
1 teaspoon vanilla

Filling:
3 cups powdered sugar
1/2 cup unsalted butter, softened
8 ounces cream cheese, softened
1 teaspoon vanilla
Pinch of salt (my addition)

Preheat the oven to 350 degrees F. Line two baking sheets with parchment paper or silpats

In a large bowl whisk together flour, salt, baking powder, baking soda cinnamon, ginger, and cloves, and set aside.

In a separate bowl whisk together the brown sugar and oil, until combined. Add pumpkin purée and whisk to combine thoroughly. Add the eggs and vanilla and whisk until combined.

Sprinkle flour mixture over the pumpkin and whisk until completely combined.

Use a small ice cream scoop with a release mechanism to droop heaping tablespoons of dough onto prepared baking sheets, about one inch apart. Bake for 10-12 minutes, until the cookies are just starting to crack on the top and a toothpick inserted into the center of the cookie comes out clean. Remove from the oven and let the cookies cool completely on the pan while you make the filling.

Make the filling:

Sift powdered sugar into a medium bowl and set aside.

In the bowl of an electric mixer fitted with the paddle attachment, beat the butter until it is completely smooth, with no visible lumps. Add cream cheese and beat until combined. Add the powdered sugar, vanilla and pinch of salt and beat until smooth. Be careful not to over beat the filling or it will loose its structure. (The filling can be made 1 day ahead. Cover the bowl tightly and put it in the refrigerator. Let filling soften at room temperature before using)

Assemble the whoopie pies:
Turn half of the cookies upside down (flat side facing up). Use an ice cream scoop or tablespoon to drop a large dollop of filling onto the flat side of the cookies. Place another cookie, flat side down, on top of the filling. Press down slightly so that the filling spreads to the edges of the cookies. Repeat until all the cookies are used. Put the whoopie pies in the refrigerator for about 30 minutes to firm up before serving. The whoopie pies will keep for up to 3 days, in a tightly covered container, in the refrigerator.
printable recipe

Foodie Friday

Sunday, October 13, 2013

Brazilian Chocolate Truffles and A New Cookbook

A new cookbook, Sprinkles! Recipes and Ideas for Rainbowlicious Desserts by Jackie Alpers is is hitting the shelves this week. At Mimi's kitchen we love sprinkles so this book was made for us. You don't have to be an avid baker to enjoy using this book; there are plenty of ideas for food projects that don't require baking. This book is beautifully photographed, full of vibrant colors that making each recipe come to life.
 From martini's to candy Jackie has a sprinkle idea. The best part is that you can customize any sprinkle recipe to your event. Use holiday colors, team colors, favorite shapes... the options are endless! 
We chose to make these Brazilian Chocolate Truffles because they were something completely new to us and sounded delicious. With only 3 pantry ingredients, plus your choice of sprinkles, a recipe can't get any easier or faster. These chewy, chocolatey candies had a flavor reminiscent of homemade stovetop chocolate pudding, which we absolutely loved. They were rich without being too sweet and the coating of sprinkles added a nice bit of texture. We will definitely make these again, maybe with a pinch of espresso powder or cayenne pepper, and change up the sprinkles for a fun festive look this coming holiday season. 


 Brazilian Chocolate Truffles
Sprinkles! Recipes and Ideas for Rainbowlicious Desserts

1 (14oz) can sweetened condensed milk
1 tablespoon unsalted butter, plus more for greasing the pan and hands
3 Tablespoons unsweetened cocoa powder
1/2 cup sprinkles.

 1. Coat a large shallow pan or platter with butter or cooking spray (I used an 8 inch square pan). In a large saucepan bring condensed milk, cocoa powder, and butter to a boil, stirring constantly with a rubber spatula (I also added a pinch of salt) . Reduce heat to medium-low and cook for 15 to 20 minutes, stirring constantly until mixture thickens. It should have the consistency of thick frosting. 
2. Pour mixture into prepared pan; let cool completely and become firm (you can refrigerate it to speed up the process). 
3. Grease your hands with butter and shape pieces into 1 to 11/2 inch balls. Roll each ball in sprinkles. Place on waxed paper and refrigerate for at least 1 hour before serving.


Monday, September 23, 2013

Apple Pie Cake

As many cookbooks as I have and love, there is always room for another one on my shelf. A while ago I added the Momofuku Milk Bar bookbook to my collection, and I love the way Christina Tossi takes an innovative approach to desserts. There are so many variations on the same desserts in different cookbooks, but her recipes really take classic flavors and bring them to a whole new level. Because I love to spend time in the kitchen, I enjoy that her recipes are multi-step and more involved than most. However, despite the steps, the recipes are not difficult and can definitely be spread out over a few days before assembling the final product. 
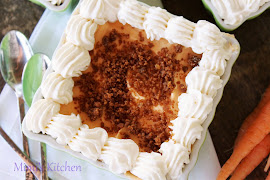
To get into the fall spirit, this Apple Pie Cake recently graced our table after dinner with friends. It combines layers of brown butter cake with cream cheese and apple pie filling, with a bit of pie crust topping. It has all the familiar flavors of the fall favorite, apple pie, but presented in a new way. 

As much as her concepts are different, so are her methods. Tossi bakes her cakes in a sheet pan, then they are cut into layers. The bottom layer is put together from partial pieces, eliminating some waste. The cake layers are then assembled in a cake ring with the fillings in between. What you need to make this cake is a 6 inch ring mold and 2 3x20 inch strips of acetate. The acetate strips are use to line the inside of the cake ring, similar to the collar on a souffle dish. This make a 6 inch 3 layer cake that easily served 6.  I used a 6 inch spring form pan to assemble the layers and it made unmolding the finished cake fairly easy. I know that I will be flipping through this book any time I want some inspiration and a delicious, but fun to make, dessert!


Barely Brown Butter Cake
4 tablespoons butter
2 tablespoons brown butter
1 1/4 cups granulated sugar
1/4 cup tightly packed light brown sugar
3 egg
1/2 cup buttermilk
1/3 cup grapeseed oil
1/2 teaspoon vanilla
1 1/2 cups cake flour
1 teaspoon baking powder
1 teaspoon kosher salt

1. Heat oven to 350 F.
2.Combine the butters and sugars in the bowl of a stand mixer fitted with a paddle attachment. Cream together on medium high for 2-3 minutes. Add the eggs and mix on medium high 2-3 minutes. Scrape down the sides of the bowl.
3. Stream in the buttermilk, oil and vanilla on low speed. Increase the speed to medium-high and beat for an additional 5 to 6 minutes. The mixture will be practically white, twice the size of your original mixture. DO NOT Under beat.
4. On low speed add the cake flour, baking powder and salt. Mix for 45 to 60 seconds, just until your batter comes together and all dry ingredients have been incorporated. Scrape down the sides of the bowl. Mix on low speed for another 45 seconds.
5. Line a quarter sheet pan with parchment or use a silpat. Using a spatula spread the cake batter in an even layer in the pan, bake for 30-35 minutes.  the cake will rise and puff, doubling in size, but will remain buttery and dense.  At 30 minutes, gently poke the edge of the cake with your finger, the cake should bounce back slightly and the center should be set. if not leave in oven 3 to 5 minutes.
6. Take cake out of the oven and cool on a wire rack until cooled. The cooled cake can be stored in the fridge, wrapped in plastic wrap, for up to 5 days.

Liquid Cheesecake
8 ounces cream cheese
3/4 cup sugar
1 tablespoon cornstarch
1/2 teaspoon kosher salt
2 tablespoons milk
1 egg.

1. Heat oven to 300F
2. Put the cream cheese In the bowl of a stand mixer with paddle attachment, mix on low speed for 2 minutes. scrape down the sides and add the sugar mix for 2 minutes, until the sugar has been completely incorporated.
3. Whisk together the cornstarch and salt in a medium bowl. Whisk in the milk, then whisk in the egg until completely incorporate.
4. With the mix on medium-low speed, stream in the egg slurry. Mix for 3 to 4 minutes, until the mixture is smooth and loose, scrape down the  bowl as necessary.
5. line the bottom and sides of a 6x6 baking pan with plastic wrap.  Pour the cheesecake batter into the pan, put the pan in the oven, and bake for 15 minutes. Gently shake the pan.  the cheesecake should be firmer and more set towards the edges of the pan, but still be jiggly and loose in the center. If jiggly all over bake an additional 5 minutes and check again.
6.Cool the cheesecake completely, to finish the baking process and allow the cheesecake to set. Once cool, the cheesecake can be stored in the fridge for 1 week.

Apple Cider Soak
1/4  cup apple cider
1 teaspoon light brown sugar
pinch cinnamon
Whisk together in a small bowl until sugar completely dissolves.

 Apple Pie Filling
1 lemon
2 medium granny smith apples
1 tablespoon butter
2/3 cup light brown sugar
1/2 teaspoon ground cinnamon
1/4 teaspoon kosher salt

1. Fill a medium bowl halfway with cold water. Juice the lemon into it.
2. Peel apples, then half and quarter them. Put each apple quarter on its side and cut a small slice down the length to remove the seeds and core. Cut each quarter length wise into thirds  and crosswise into fourths, transfer the 12 pieces to the lemon water.
3. Drain lemon water from apples, and combine them  in a small sauce pan  with the butter, sugar, cinnamon and salt. Over medium heat bring to a boil, stiring gently so as not to break up the apples. Cook for 3- 5 minutes until soft, but not applesauce.  Remove from heat and cool. Once cooled the filling can be refrigerated in an air tight container for 1 week.
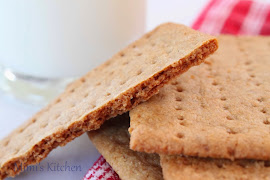
Pie crumb
1 1/2 cup flour
2 tablespoons sugar
3/4 teaspoon kosher salt
8 tablespoons butter, melted
1 1/2 tablespoons water

1. Heat oven to  350F
2. Combine the flour, sugar and salt in the bowl of a stand mixer with paddle attachment, mix on low speed.  Add the butter and water and paddle on low speed until the mixture starts to come together in small clusters.
4. Spread the clusters on a parchment or silpat lined sheet pan. Bake for 25 minutes, breaking them up occasionally. the crumbs should be golden brown and still slightly moist to the touch.
5. .Let the crumbs cool completely before using in a recipe. Crumbs can be stored in an air tight container for 1 week or a month in the fridge or freezer

Pie crumb frosting
1/2 recipe pie crumbs
1/2 cup milk
1/2 teaspoon kosher salt
3 tablespoons butter
1/4 cup confectioners' sugar

1. Combine pie crumbs, milk and salt in a blender, puree on medium high until smooth and homogeneous.
2. Combine butter and confectioners' sugar in the bowl of a sand mixer with paddle attachment and cream on medium high for 2-3 minutes, until fluffy and pale yellow. Scrape down the sides of the bowl.
3. On low speed and the contents of the blender. Beat for 1 minute. Increase speed to medium high and beat for 2 minutes. Mixture should be uniform, very pale,barely tan color, if not beat another minute or 2. Use immediately or refrigerate for up to 1 week.

1  six inch cake ring
2-  3 inch wide and 20 inches long strips of acetate


Assembly:
1. Invert cooled cake on parchment line counter and peel off the parchment from he bottom of the cake.  Use the cake ring to cut out 2 circles from the cake,  these will be your top 2 layers.  The remaining cake scrap will come together to make the bottom layer of the cake.

Layer 1
place cake ring on parchment lined sheet pan, line the inside of the ring with one strip of the acetate.  Put the cake scrapes inside the ring and use the backs of your hand to tamp the scraps together into a flat even layer.
Dunk a pastry brush in the apple cider soak and give the layer of cake a good healthy soak with half the cider soak mix. Spread 1/2 of liquid cheesecake over the cake in an even layer. Sprinkle 1/3 of the pie crumbs evenly over the cheesecake layer. Pat in place. spread 1/2 of the apple pie filling evenly over the pie crumbs.

Layer 2
Tuck the second acetate strip between the cake ring and the top 1/4 inch of the first acetate strip, so now you have a clear ring of acetate that is 5-6 inches tall, it will support your cake.
Set a second layer of cake on top of the filing and repeat the process for layer one.

Layer 3
Top filling with remaining cake layer. Cover the top of the cake with 1/2 of the frosting and garnish with remaining pie crumbs.
Transfer the sheet pan to the freezer and freeze for 12 hours to set the cake and filling.
Three hour before serving remove the cake from the freezer. Pop the cake out of the cake ring and gently peel off the acetate. At this point I used the remaining frosting to frost the sides of the cake. Transfer cake to cake plate and defrost in the fridge until serving time.


Foodie Friday

Tuesday, August 27, 2013

Pear Upside-Down Cake

The peaches, plums, and nectarines of summer are almost gone,  but the pears, apples and figs of fall are already showing up in stores and farm stands in our area. My neighbor Mrs. M found this Martha Stewart recipe for Pear upside-down cake, and knowing how much we like pear desserts, she passed this along to me.

 The cake is soft and moist with a fine texture, that is not to dense or to airy, but just perfect for soaking up all the caramelized sugars and juices from the pears when the cake is flipped over. This cake is simple to make and has very few ingredients, so the pear flavor really shines. To top it all off, we added a drizzle of butterscotch sauce, which complemented the warm sweet flavors of the fruit and brown sugar, but this cake is equally delicious all on its own. As the days start to get shorter and cooler, we will be making plenty more pear desserts, and I know this one will be making several more appearances. 

Pear Upside -Down Cake
adapted from Martha Stewart
Topping
  • 4 tablespoons unsalted butter
  • 1/2 cup packed light-brown sugar
  • 3 ripe pears, such as Bartlett or Anjou, peeled and cored      
Cake Batter:
  • 1 1/2 cups all-purpose flour
  • 2 teaspoons baking powder
  • 1/4 teaspoon salt
  • 8 tablespoons (1 stick) unsalted butter
  • 1 cup granulated sugar
  • 1 teaspoon pure vanilla extract
  • 2 large eggs, separated
  • 1/2 cup whole milk
  • 1/4 teaspoon cream of tartar
1.  Make the topping: Melt butter in the bottom of a 10 1/2-inch cast-iron skillet over low heat. Add brown sugar, stirring until dissolved. Swirl to coat the bottom; remove from heat, and cool. Cut pears into 1/4-inch-thick wedges, and arrange them in a circular pattern over the brown-sugar mixture to cover completely; set aside.
2. Make the batter: Preheat the oven to 350 degrees. In a medium bowl, whisk together flour, baking powder, and salt; set aside.
3. In the bowl of an electric mixer fitted with the paddle attachment, cream butter and sugar on medium speed until light and fluffy, about 2 minutes. Add vanilla extract; beat to combine. Add egg yolks, one at a time, beating to combine
4. Alternating with the milk, gradually add the flour mixture to the butter mixture, and mix, on low speed, just until the flour is incorporated.
5. In a large bowl, beat reserved egg whites and the cream of tartar with a hand mixer until stiff but not dry. Using a rubber spatula, fold egg whites into the batter. Transfer to skillet. Using an offset spatula, spread the batter evenly, being careful not to disturb the pears.
6. Bake until well browned on top and a cake tester inserted into the center comes out clean, about 45 minutes. Run a knife around inside of pan, and immediately invert the cake onto a serving dish. Serve warm or at room temperature.
printable recipe


Foodie Friday

Thursday, August 15, 2013

Oreos


 Often the question is, Chocolate or Vanilla? But in this month's Improv Challenge, we were challenged to combine those two classic flavors into one dessert. The choices were endless, but homemade Oreos have been on my to do list for a long time and once again the Improv Challenge gave me the boost I needed to cross something off my "must make" list. I reviewed lots of recipes and decided that I would try Thomas Keller's version of Oreos. Interestingly enough, there are several different recipes that claim to be Thomas Keller Oreos so I went to the source, Bouchon Bakery cookbook by Thomas Keller.

 These cookies were good, but they were not Oreos. The cookies were buttery, and chocolatey with a delicate sandy texture, and the white chocolate filing was perfect for them, but nothing like the classic Oreo filling that is arguably the best part of the cookie. To get something closer to the Oreo taste, I also made a more traditional creme filing that really tasted like Oreo filling. 

 The ganache really enhanced the flavor of the cookie itself, but once filled, the cookies quickly lost their crispness. In the other cookies, the more traditional creme filling seemed to mute the chocolate flavor of the cookies, but they stayed crispy and crunchy much longer. So, while not the perfect homemade version of an Oreo, these are cookies that we quickly devoured and will definitely be making again.


 Oreos:
 from Bouchon Bakery by Thomas Keller and Sebastien Rouxel

 Ingredients:
 White Chocolate Filling:
 4 ounces (125 grams) 35% white chocolate, chopped
 0.5 ounce (15 grams) Unsalted butter
1/2 teaspoon vanilla* My addition
 ½ cup + 1 teaspoon (125 grams) Heavy cream

 Chocolate Shortbread:
 1 ¾ cups + 1 ½ tablespoons (259 grams) All-purpose flour
 1 cup + 1 ½ tablespoons (87 grams) Unsweetened alkalized cocoa powder
 3/8 teaspoon (1.6 grams) Baking soda
 8 ounces (227 grams) Unsalted butter
 2 teaspoons (6 grams) Kosher salt* I used 1 teaspoon kosher salt
 ¾ cup + 1 tablespoon (161 grams) Granulated sugar

 Instructions
For the filling: Melt the chocolate and butter together, stirring constantly. Meanwhile, bring the cream to just under a simmer. Pour the cream over the melted chocolate and whisk to combine. Pour into a container and refrigerate for at least 4 hours, or up to 1 day, until completely chilled.

For the shortbread:
Place the flour in a medium bowl, sift in the cocoa and baking soda, and whisk to combine.
Place the butter in the bowl of a stand mixer fitted with the paddle attachment. Turn to medium-low speed and mix until smooth. Add the salt and mix for another 15 to 30 seconds. Add the sugar and mix for about 2 minutes, until fluffy. Scrape down the sides and bottom of the bowl. Add the dry ingredients in 2 additions, mixing on low speed for 15 to 30 seconds after each, or until just combined, then mix until the dough begins to come together
Mound the dough on the work surface and, using the heel of your hand or a pastry scraper, push it together into a 6-inch-square block. Wrap in plastic wrap and refrigerate for at least 1 hour, until firm. (The dough can be refrigerated for up to 2 days or frozen for up to 1 month.)

Position the racks in the upper and lower thirds of the oven and preheat the oven to 325°F (standard). Line two sheet pans with Silpats or parchment paper. Unwrap the dough and place it between two pieces of parchment paper or plastic wrap. With a rolling pin, pound the top of the dough, working from left to right, to begin to flatten it, then turn the dough 90 degrees and repeat (this will help prevent the dough from cracking as it is rolled). Roll out to a ⅛-inch-thick sheet. If the dough has softened, slide it (in the parchment) onto the back of a sheet pan and refrigerate until firm enough to cut. Using the fluted cutter, cut rounds from the dough. If necessary, push the trimmings together, refrigerate until firm, and reroll for a total of 16 rounds. (Any trimmings can be baked as is, cooled, and ground in the food processor to use as cookie crumbs over ice cream.) If the dough softens, return to the refrigerator until the cookies are firm enough to transfer to a sheet pan. Arrange the rounds on the sheet pans, leaving about I inch between them. (The dough can be shaped in advance; see Note.) Bake for 15 to 17 minutes, turning the pans around halfway through baking, until the cookies are fragrant, with small cracks on the surface. (Because the cookies are so dark, it can be difficult to tell when they are done.) Set the pans on a cooling rack and cool for 5 to 10 minutes, then transfer the cookies to the rack to cool completely.
To assemble the cookies: Place the filling in the bowl of the mixer, fitted with the paddle attachment, and beat until smooth. Transfer to the pastry bag. Turn half of the cookies over. Pipe ½ inch-long teardrops in a ring on each one, beginning ⅛ inch from the edges of the cookie, and then, working toward the center, pipe concentric rings of teardrops to cover the cookie (use 18 grams of filling per cookie). Top each with a second cookie and press gently to sandwich the cookies. The cookies are best the day they are baked, but they can be stored in a covered container, at room temperature if unfilled, or refrigerated if filled, for up to 3 days.
 Note on advance preparation: The shaped dough can be frozen on the sheet pan—wrapped in a few layers of plastic wrap—for up to 1 month. Transfer to a lined room-temperature sheet pan, and bake from frozen.

Creme filling
Adapted from Retro Desserts, Wayne Brachman

For the filling:
1/4 cup (1/2 stick or 55 grams) room-temperature, unsalted butter
1/4 cup (50 grams) vegetable shortening
2 cups (240 grams) sifted confectioners’ sugar
2 teaspoons (10 ml) vanilla extract

To make the creme, place butter and shortening in a mixing bowl, and at low speed, gradually beat in the sugar and vanilla. Turn the mixer on high and beat for 2 to 3 minutes until filling is light and fluffy.