Every Christmas our family makes fudge to give away as part of our cookie trays. It was always my favorite Christmas treat as a little girl, and we still use the same recipe that my mom did. It always turns out rich, creamy and super chocolatey. For many years I have wanted to try a white chocolate fudge, but I always run out of time. This year, while flipping though an old issue of Taste of Home Holiday Recipes I came across this fudge recipe and decided that this was the year I was going to make it. It also fits into the December Improv challenge, using both marshmallows and chocolate, so all the more reason to try it. White chocolate always seems so sweet, but I liked the idea of the apricots and walnuts to balance that sweetness.

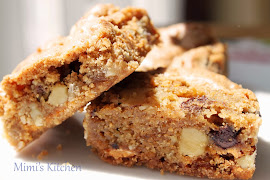
White Chocolate Apricot Fudge
adapted from Taste of Home Holiday Recipes 2009
1/2 cup butter
2 cups sugar
3/4 cups sour cream
1 teaspoon vanilla
1/4 teaspoon salt
12 ounces white chocolate, chopped
1 7 oz jar marshmallow cream
3/4 cup chopped dried apricots*
3/4 cup chopped toasted walnuts*
Line a 9 inch square pan with foil, grease foil with butter.
In a large bowl combine chopped white chocolate, marshmallow cream and salt. Set aside.
In a heavy sauce pan combine sugar, sour cream and butter. Stirring constantly, bring to a boil over medium heat. Cook, stirring until soft ball stage, 234 degrees, about 5 1/2 minutes.
Pour sugar mixture over chocolate and marshmallow cream and stir until chocolate is completely melted. Add vanilla stirring to incorporate. Fold in apricots and walnuts.
Pour into pan allow to set over night or until firm. Use the foil to remove from pan and cut into 1 inch squares.
*This is the recipe I made, but next time I would add more of both the apricots and the walnuts and I would finely chop the apricots.
printable recipe


links:Foodie Friday