Sunday, June 26, 2011

4th of July Cookies


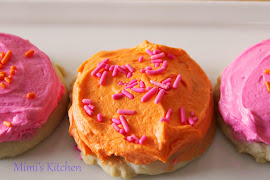
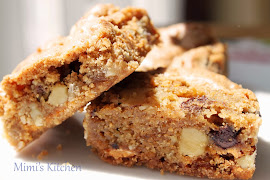
The minute my neighbor Mrs. M handed me her latest Martha Stewart magaine, I knew I would make these cookies from the cover. It just so happened that Mini Me was home from school for the week and she wanted to make cookies, so we grabbed our aprons and set to work. These cookies were not only gorgeous to look at, but really fun and easy to make.

 We made our favorite sugar cookie recipe and a big batch royal icing, and had an afternoon of fun. Although these are just in time for the 4th of July, we thought they would be a fun and easy idea to tailor to any holiday color scheme with the pretty pattern.


I don't have any how to pictures- we were having so much fun I forgot to pick up my camera. I'm sure you could find them on the Martha Stewart web site. I think the trick is to have your icing very thin to get the fluid motion as the colors flow together.


Steps:

1. Outline and flood your cookies with royal icing. We used white for the background.
2. Pipe a dot of color in the center followed by concentric circles of color. On the cookie below the center dot was navy blue followed by three rings of red and ending with a blue ring. Now drag a toothpick from the outer edge to the center of the cookie. Start in center and drag the tooth pick back to the edge of the icing, making a "V" shape with the toothpick. Repeat the process all the way around the cookie


To get some variety you can vary the width of your colored rings and how close together you drag your toothpick to the center to make different patterns. You might only drag the tooth pick from the center, or only from the edge into the center. You can use several different sized cookies, or make some in only two colors instead of three. There are so many ways to do these and they all turn out beautiful, so have fun!


Happy July 4th!


Links:This Chick Cooks
Cast Party at the Lady Behind the Curtain
Foodie Fridays at Designs by Gollum

Wednesday, June 22, 2011

Humming Bird Cupcakes


 Mimi Jr. decided to make these yummy tropical cupcake for her friend's birthday. The recipe for these Hummingbird cupcakes is from Martha Stewart Cupcakes. They were kind of a cross between carrot cake and banana bread, with the chunks of pineapple, crunchy walnuts and dash of cinnamon bringing everything together into a unique but delicious cupcake. They were very moist and flavorful without being too sweet. Unfrosted, they would make a great breakfast muffin, but everything is good with a swirl of cream cheese frosting so we definitely couldn't leave that out for these birthday cupcakes.

The sweet, slightly crispy dried pineapple flower was the perfect decoration for these cupcakes. It adds to the tropical feel of these treats, was easy to make, and tasted good! These were great for an early summer birthday, but would also be fun for a luau themed party or barbecue. We think diced mango would be a fun addition to add some more tropical flavor and texture to these delicious cupcakes.


Humming Bird Cupcakes
via Martha Stewart Cupcakes
Ingredients:
3 cups all-purpose flour, plus more for pan
1 teaspoon baking soda
1 teaspoon ground cinnamon
1/2 teaspoon salt
1 cup (2 sticks) unsalted butter, melted and cooled
2 teaspoons pure vanilla extract
2 cups sugar
3 large eggs
2 cups mashed ripe banana (about 3 large)
1 can (8 ounces) crushed pineapple, drained
1 cup chopped walnuts, or pecans
1 cup unsweetened desiccated coconut
Cream Cheese Frosting - We did  not use Martha's recipe. Our favorite recipe is below.
Dried Pineapple Flowers

Directions

1. Preheat oven to 350 degrees with rack in center. Line cupcake pan with paper liners; set aside. In a medium bowl, whisk together flour, baking soda, cinnamon, and salt; set aside.
2 .In the bowl of an electric mixer fitted with the paddle attachment, beat butter, vanilla, and sugar until combined, about 2 minutes. Add eggs one at a time, incorporating each before adding the next. Beat at medium speed until mixture is pale yellow and fluffy, about 3 minutes.
3. In a medium bowl, stir together banana, pineapple, walnuts, and coconut. Add to egg mixture, mixing until combined. Stir in flour mixture.
4. Divide batter evenly among liners, filling about 2/3 full. Bake, rotating pans halfway through, until golden brown and a cake tester inserted in the center comes out clean, 25 to 28 minutes. (ours were done closer to 22 minutes)
5. Transfer to a wire rack to cool completely. Once cupcakes have cooled, frost tops of each cupcake. Decorate with dried pineapple flowers, if desired. Serve at room temperature.
printable recipe


Cream Cheese Frosting
via Cooks Illustrated
Ingredients:

1 cup (2 stick) unsalted butter, room temperature
1 pound confectioners' sugar, sifted 
16 ounces cream cheese, cut in to 8 pieces, room temperature
1 1/2 teaspoons vanilla
Pinch of salt

Directions
1.In the bowl of an electric mixer fitted with the paddle attachment, beat butter and sugar on medium high speed until fluffy, about 2 minutes.  Add cream cheese, 1 piece at a time, and beat until incorporated.
2.Beat in vanilla and salt.Continue beating until light and fluffy. Refrigerate until ready to use.

printable recipe

Pineapple flowers
Martha Stewart
Directions
1.Preheat oven to 225 degrees. Line two baking sheets with nonstick baking mats or parchment paper.
2.Cut top and bottom off pineapple, and slice off all the skin, but leave pineapple whole. Using a small melon ball-er, remove and discard pineapple "eyes." Using a sharp knife, cut pineapple crosswise into very thin slices. Transfer slices to baking sheets. Bake until tops look dried, about 30 minutes. Flip slices; bake until completely dried, 25 to 30 minutes more. Pinch center of each pineapple slice to shape into a cone, and let cool in a clean egg carton or muffin tin to form flowers. Refrigerate in an airtight container up to 3 days.


Ours took forever to dry in the oven and they had a caramelized edges which were delicious, but made them slightly brown, not as yellow as the pictures in the book. Martha's pineapple flowers were very yellow just like the freshly cut pineapple and I think that could be achieved if you used a food dehydrator instead of the oven.


Enjoy!


Link:Foodie Friday at Designs by Gollum
This Chick Cooks

Tuesday, June 14, 2011

Busy Bees


You could say that Mimi Jr. and I have been busy as bees making cookies. Mimi Jr. works with a very creative and talented woman, L, who was planning a bee themed birthday party for her six year old daughter, T.  She asked Mimi Jr. if we would help out and make some bee cookies for the party. Never one to turn down an opportunity to make cookies, Mimi Jr. said yes. L sent over some ideas, and based on the pictures she showed us, we created these buzzing bee sugar cookies.


We used our favorite sugar cookie recipe and royal icing to make our cookies. Since we had to make 100 of these, we spread out the work over a few days.


First we searched the internet for a bee that we liked and then used it to make a template for our bees. We printed out a sheet of bees and covered it with a sheet of wax paper that we taped to the kitchen island. Then with royal icing we traced over and flooded the the bees wings. When these were dry, we did the head and body, making sure the colors touched so we could peel them off in one piece. We fit 20 bees on each piece of wax paper, and just moved the printed paper to another space on the island and topped it with more wax paper for each new set of 20. We let these dry completely. When the cookies were baked, we flooded them with a pale yellow color and placed the dried bees on top of the almost dry flood icing. When the flood icing was completely dry we added the final details- we did the eyes and mouth with a food writer, and piped the antena and flight path with royal icing.


This was our first real "cookie order" for someone other than family, and we learned a few things along the way. Wait until your flood is almost dry to attach your detail so the wet icing doesn't make the colors from the bee/detail  bleed, and don't press them down too hard or your flood icing will wrinkle around the detail.


L made this gorgeous bee hive cake and matching cupcakes with toppers that coordinated with the party invitation. For the boys she had worker bee hard hats, and she made some cute flower headbands for the girls. Party favors included a yellow beach pail filled with assorted black and yellow candy and toys. No detail was over looked in her party planning, and her daughter's excited face made everything worth it.

The worker bees and a crown, for the birthday queen

Happy Birthday T, and Thank You L for letting us create the cookies for your bee-autiful party!


Link: Foodie Fridays at Designs by Gollum
         Cast Party  At the Lady Behind the Curtain

Monday, June 6, 2011

Berry Fool


Sometimes the foods with the strangest names are the very best. And this fool is no exception. Fools are a great easy, light and refreshing dessert. They are also easily adaptable and can be made with a variety of fruits and berries. Cook's Illustrated had a recipe for berry fool in their Best-Ever Recipes issue and it fit in perfectly with a recent outdoor grilling dinner party. It's a little different from other fools that I've made because it has gelatin in the berry mixture. I was a little unsure about that, since I definitely did not want berry jello, but it really worked out nicely giving just the right amount of body to the berries and allowing the streaks of puree to remain distinct in the cream.

 When you have perfectly ripe fruit, you can easily decrease the amount of sugar you use to make this a semi healthy summer dessert. We eliminated the sugar entirely from the berry mixture, and loved the fresh, naturally juicy strawberries just by themselves. We are looking forward to trying it with peaches when our crop comes in, and whatever berries we can find at the farmer's markets around town. The recipe below is our take on the berry fool.


Berry Fool
adapted from Cook Illustrated

Berries:
2 1/2  pounds strawberries, hulled
1/2 cup sugar, plus 2 tablespoons
2 teaspoons unflavored gelatin

Cream:
1 cup heavy cream
1/4 cup sour cream
1/2 teaspoon vanilla
2 tablespoons sugar

1. Process half of the berries with 1/2 cup sugar in a food process until mixture is completely smooth. Strain berry puree through a fine mesh strainer. You should have 2 1/2 cups puree. Transfer 1/2 cup of puree to a small bowl and sprinkle the gelatin over the top and stir to incorporate. Let stand 5 minutes .

2. Heat the remaining puree in a sauce pan until it bubbles (4-6 minutes). Remove sauce pan from heat and stir in the gelatin puree, mixing until gelatin is dissolved. Pour into a bowl, cover with plastic wrap and refrigerate until cold, about 2 hours.

3. Chop the remaining strawberries into 1/4 inch pieces and toss with 2 tablespoons sugar set aside for 1 hour.  Our berries were sweet, so we did not add the sugar.

4. Whip together, heavy cream, sour cream, vanilla and 2 tablespoons sugar until stiff peaks form. Reserve about 1/3 cup for garnish. To remaining cream, whisk in the 2/3 of chilled berry puree until fully incorporated. Gently fold in remaining puree, leaving thick streaks of puree.

5. Assemble: drain uncooked diced berries to remove juice and divide 2/3 of the berries evenly among 6 individual serving dishes/glasses. Top with the creamy berry mixture, followed by remaining uncooked berries. Top each dish with reserved whipped cream. Chill until serving.